Have you ever received a handwritten letter in the mail, the kind that makes you feel special and appreciated? Imagine carrying that same sentiment with you wherever you go, in the form of a DIY wallet card. These small, personalized creations offer a creative and personal touch to your everyday life. Whether it's a quote that inspires you, a photo of a loved one, or a unique design that reflects your personality, these wallet cards are a constant reminder of the things that bring you joy. But how do you go about making one? And what materials should you use? In this discussion, we will explore the steps to create your own DIY wallet card, from choosing the right materials to adding creative embellishments. Get ready to add a touch of creativity to your everyday carry.
Choosing the Right Materials
To ensure the durability and functionality of your DIY wallet cards, it is essential to carefully select the right materials. When it comes to sourcing options, there are plenty of budget-friendly alternatives available that can help you create wallet cards that are both stylish and practical.
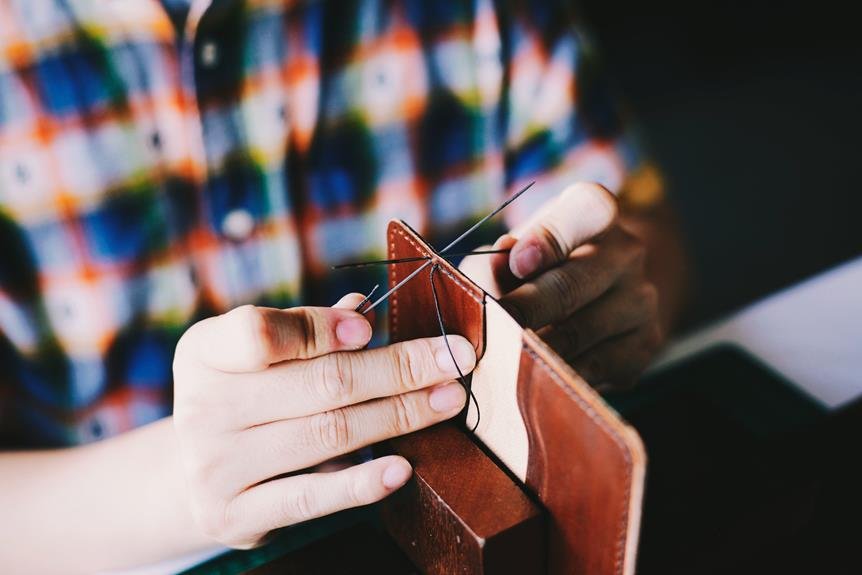
One of the best materials to consider for your DIY wallet cards is leather. Genuine leather is known for its durability and timeless appeal. You can easily find leather scraps at local craft stores or even repurpose old leather items, such as belts or bags. If you're on a tight budget, faux leather is a great alternative that still offers a similar look and feel.
Another option is fabric. Look for sturdy fabrics like canvas or denim that can withstand the wear and tear of everyday use. You can choose from a wide range of patterns and colors to personalize your wallet cards. Consider using fabric scraps or repurposing old clothes to keep costs down.
If you prefer a more eco-friendly approach, consider using recycled materials. Old credit cards, gift cards, or even plastic packaging can be cut into the desired size and shape to create unique and durable wallet cards.
Designing Your DIY Wallet Card
Now that you have chosen the right materials for your DIY wallet cards, it's time to unleash your creativity and design a wallet card that reflects your unique style and personality. One important factor to consider when designing your wallet card is the size. Wallets come in various sizes, so make sure to measure the dimensions of your wallet before starting the design process. This will ensure that your card fits perfectly without any inconvenience.
When it comes to color combinations, the possibilities are endless. Think about what colors speak to you and represent your personality. You can experiment with different shades and hues, or even try a monochromatic color scheme for an elegant and sophisticated look. If you prefer a bold statement, consider contrasting colors that create a striking visual impact.
To make your wallet card truly unique, you can incorporate other design elements such as patterns, illustrations, or even photographs. These can add a personal touch and make your wallet card stand out from the rest. Don't be afraid to mix and match different design elements to create a visually appealing and one-of-a-kind wallet card.
Personalizing With Photos and Quotes
Add a personal touch to your DIY wallet card by incorporating your favorite photos and meaningful quotes. Customizing options for your wallet card are endless, allowing you to create a unique and sentimental item that reflects your personality and values.
When it comes to adding photos to your wallet card, you can choose to include pictures of loved ones, pets, or memorable moments. Select images that hold a special place in your heart, evoking happy memories or reminding you of your goals and aspirations. These photos will not only add a personal touch to your wallet card but also serve as a constant source of inspiration and motivation.
In addition to photos, incorporating meaningful quotes can further enhance the sentimental value of your wallet card. Choose quotes that resonate with you, whether they are from your favorite book, song, or even a personal mantra. These words of wisdom will serve as a reminder of your values, dreams, and the person you aspire to be.
Adding Creative Embellishments
Get ready to take your DIY wallet card to the next level with some creative embellishments that will make it truly stand out. When it comes to adding unique textures and exploring different shapes and sizes, the possibilities are endless. Let your imagination run wild as you experiment with various materials and techniques.
To incorporate unique textures, consider using materials such as fabric, lace, or even sandpaper. Cut them into different shapes and sizes to create interesting patterns and designs. For a more rustic look, you can try using twine or burlap to add a touch of natural texture. You can also experiment with embossing techniques to create raised patterns that give your wallet card a three-dimensional look and feel.
Exploring different shapes and sizes can also add visual interest to your DIY wallet card. Instead of sticking to the traditional rectangular shape, why not try cutting your card into a circle, heart, or even a star? You can also layer different shapes on top of each other to create a unique and eye-catching design.
Remember to experiment and have fun with your embellishments. The key is to let your creativity shine through and create a wallet card that reflects your personal style. So go ahead, grab your materials, and start adding those creative embellishments to make your DIY wallet card truly one-of-a-kind.
Ensuring Durability and Longevity
As you continue to enhance your DIY wallet card with creative embellishments, it's important to ensure its durability and longevity for long-lasting enjoyment. One crucial step in achieving this is choosing the right adhesive for your project. When it comes to adhesives, there are a variety of options available, each with its own strengths and weaknesses. For paper-based embellishments, such as photos or cutouts, a glue stick or a liquid glue that dries clear would work well. These adhesives provide a strong bond and are easy to apply. However, if you're working with heavier materials like metal charms or beads, a stronger adhesive such as epoxy or super glue would be more suitable. It's important to read the instructions and select an adhesive that is compatible with the materials you are using.
In addition to choosing the right adhesive, it's also essential to protect your DIY wallet card against wear and tear. One way to do this is by applying a clear coat or sealant over the entire surface of the card. This will create a protective barrier that helps prevent scratches and fading. Another option is to laminate the card using a laminating machine or self-adhesive laminating sheets. Lamination provides a sturdy and waterproof finish, making your card more durable and resistant to damage.
Conclusion
So there you have it – DIY wallet cards are a fantastic way to add a creative and personal touch to your everyday carry. By choosing the right materials, designing a unique and eye-catching card, personalizing it with photos and quotes, and adding creative embellishments, you can create a wallet card that truly reflects your personality. And don't forget to ensure durability and longevity by using sturdy materials and protective coatings. With your DIY wallet card in hand, you'll have a stylish and meaningful accessory that you'll cherish for years to come.
Leave a Reply